Framing a Finished Piece
How I frame my own cross stitch — pinning, taping, and getting a clean tight finish, with or without glass.
August 11, 2020
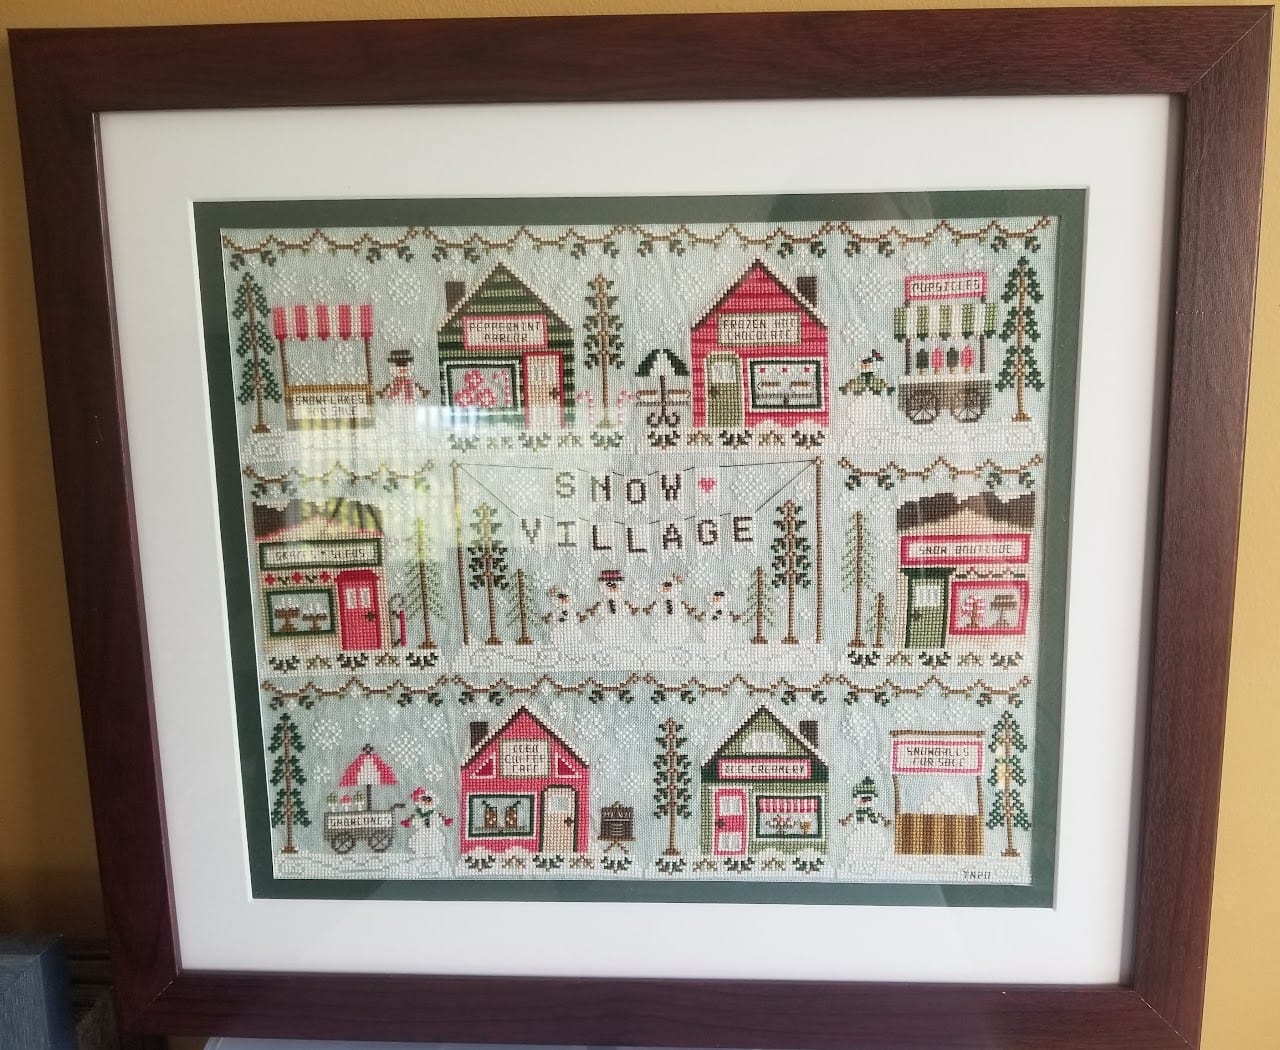
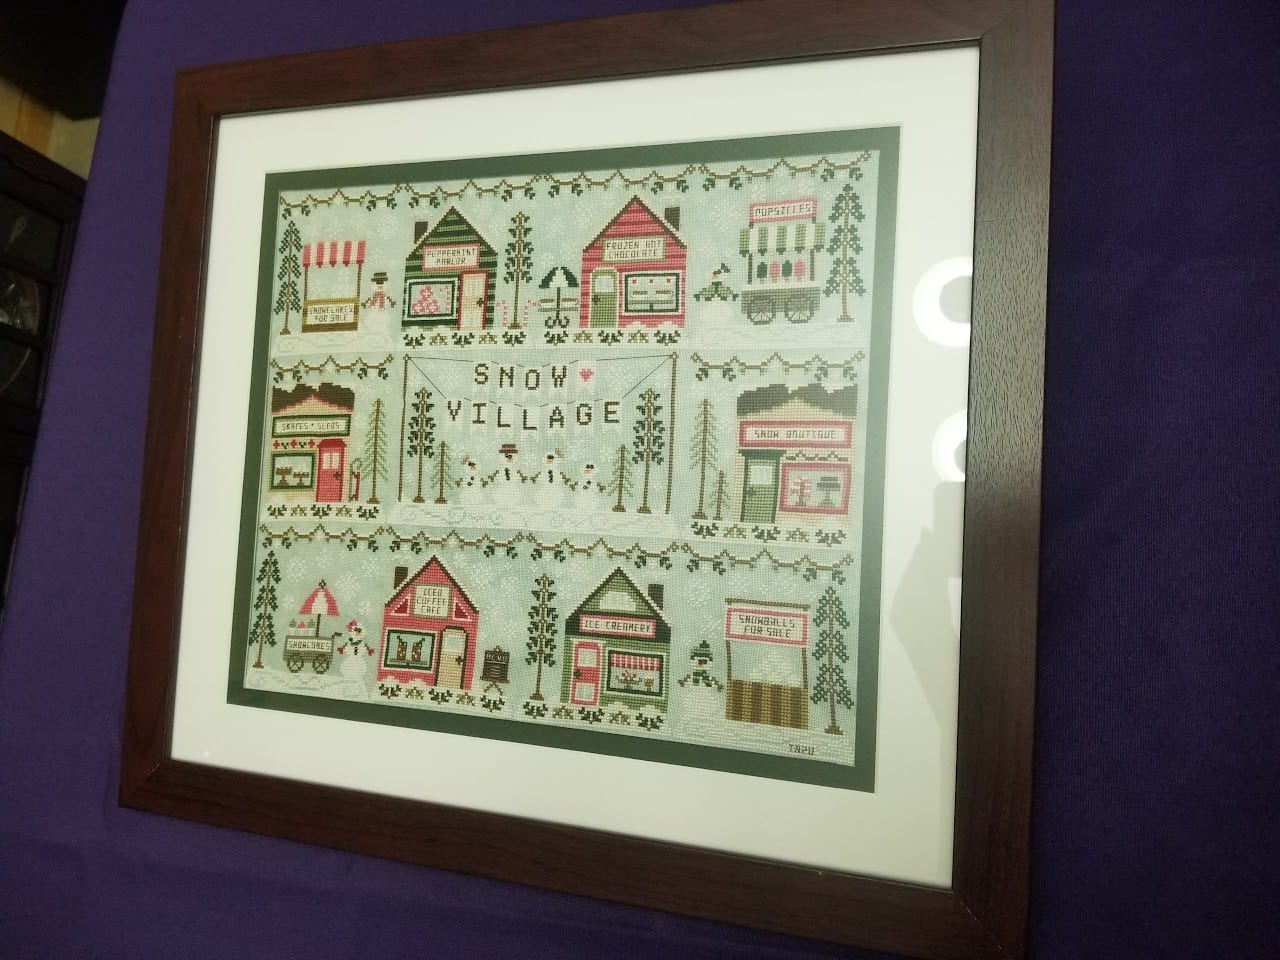
Framing your own cross stitch! Have you ever done one yourself? I have, and here is a step-by-step way to do it — whether you’re using a frame with or without glass.
Before you start
Get these out of the way first:
- Sign your piece (if you want to)
- Wash your piece
- Iron your piece
- Add any beading or french knots
- Now you’re ready to frame
What you’ll need
- Your finished piece
- A frame — I order mine pre-cut from frameiteasy.com
- Acid-free foam core, cut to fit your frame (craft store)
- Framing tape
- T-pins or straight pins

Step 1 — Center the design
Start with a clean working area. Take your finished piece and center the design over the foam core. This is also when you can trim your edges down to about 2–3” of margin if you’d like.
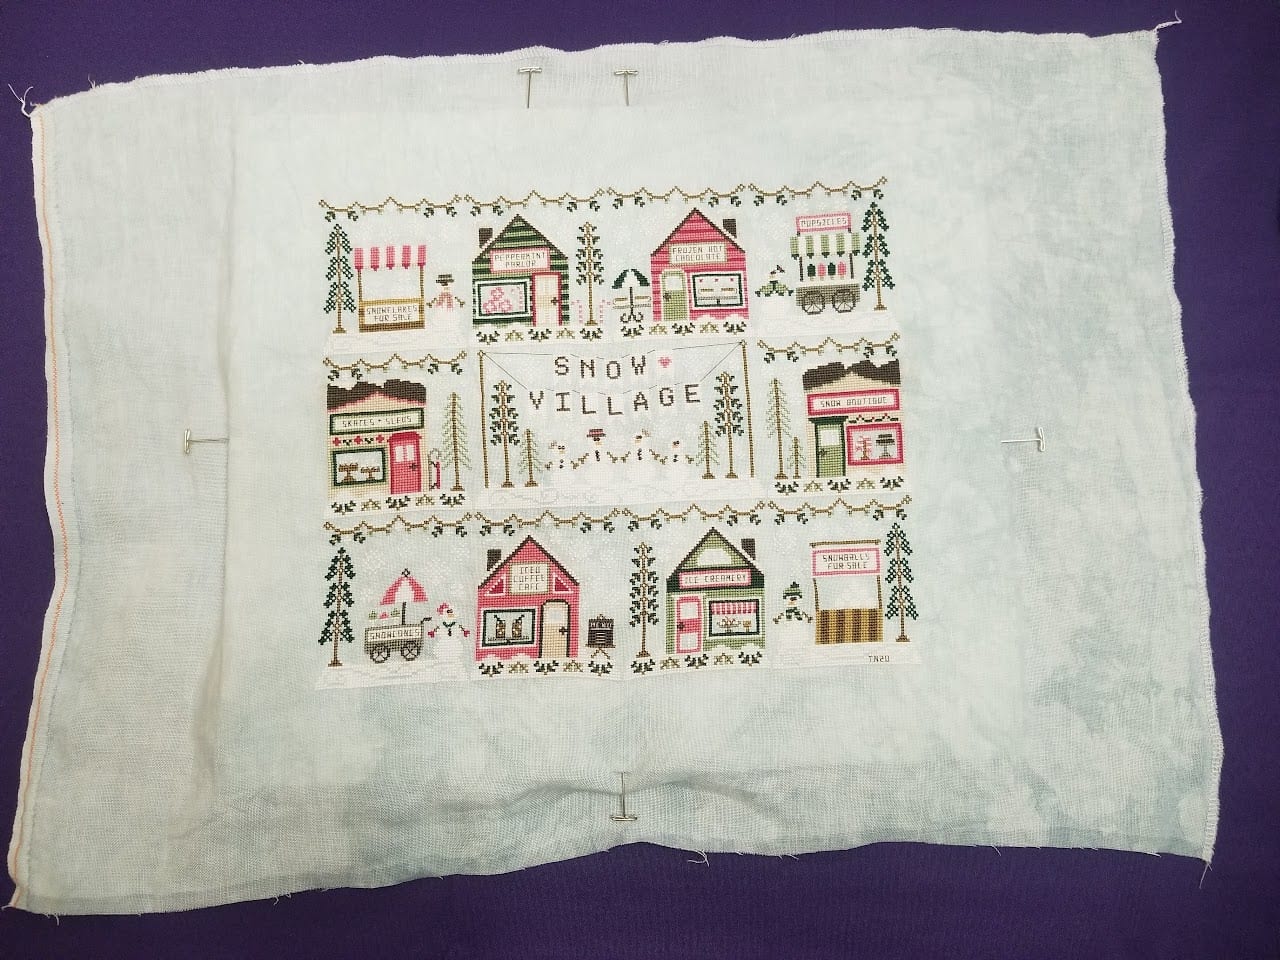
Step 2 — Pin it in place
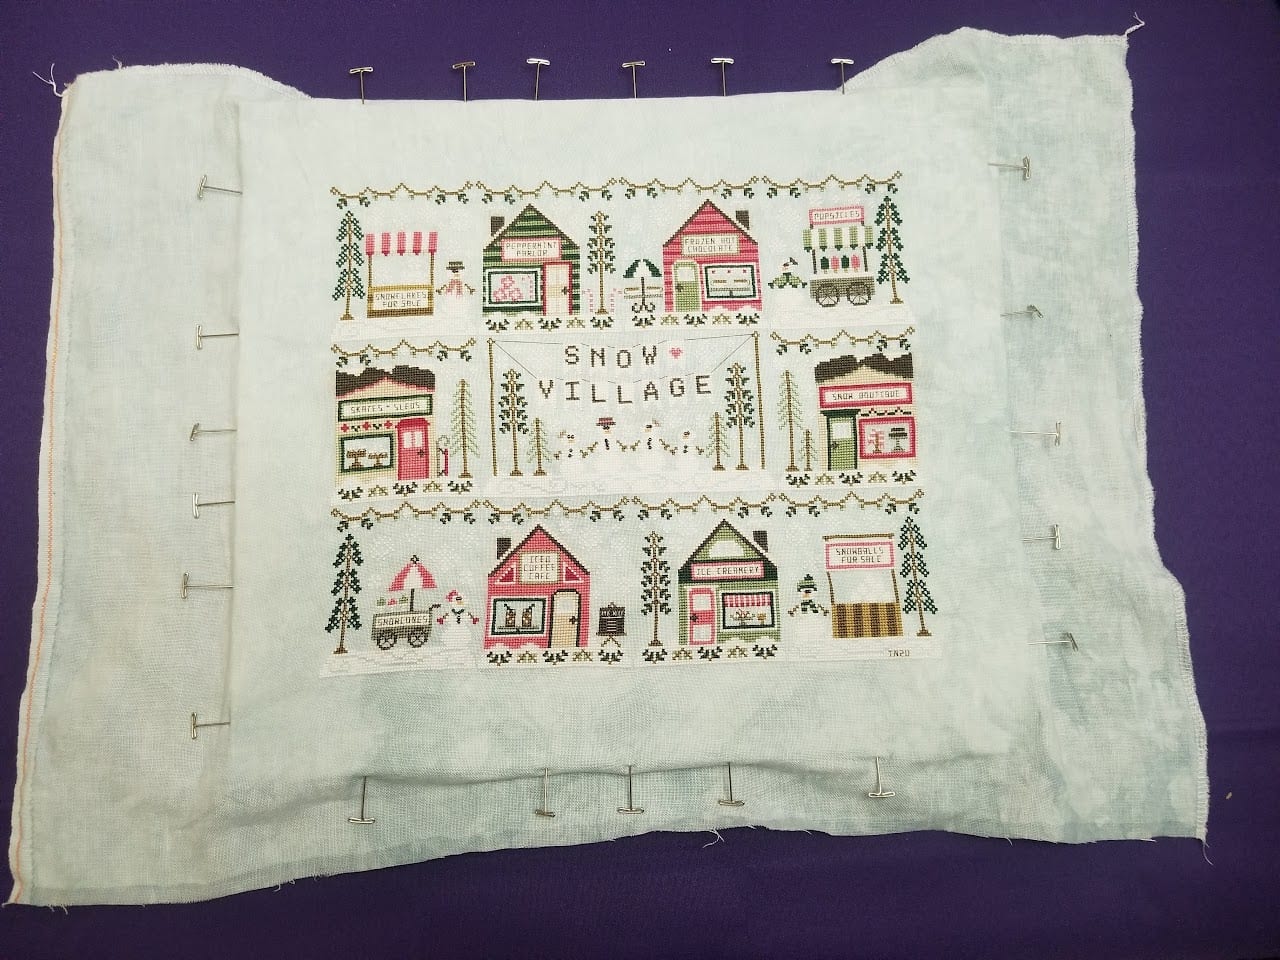
Using straight pins, start placing pins through the fabric and into the edges of the foam core. Begin with one pin in the middle of each of the four sides, then work outward toward the corners. Place a pin every 1” or so.
This step is critical, so take your time. As you place pins, gently pull the fabric so it begins to stay nice and tight along the foam core — but don’t pull so hard that it stretches the design.
Step 3 — Tape the back
Once all the pins are in place and you’re happy with the alignment, push them all the way down into the foam core. Then flip the piece over and start wrapping the fabric around the foam core, using framing tape as you go. Fold the corners in to make a nice tight corner — kind of like wrapping a present.
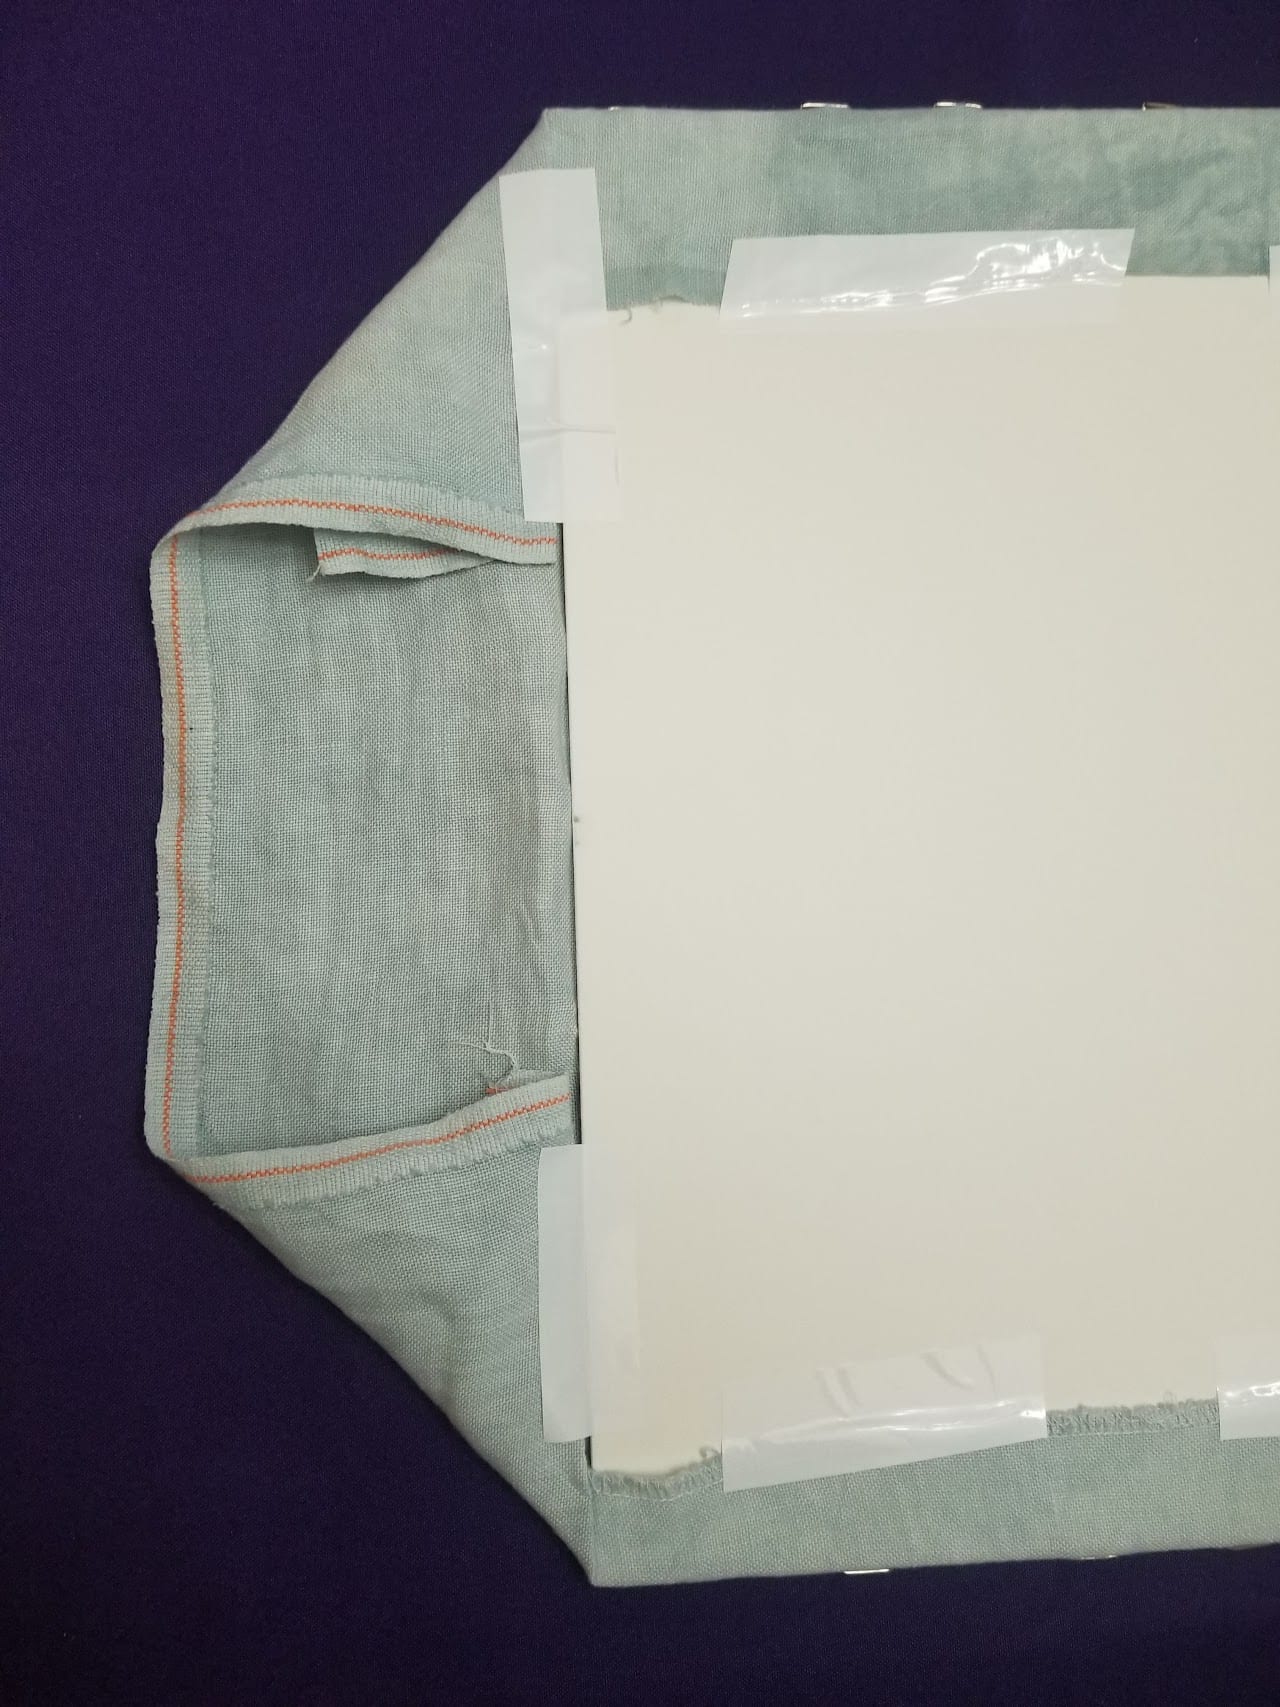
Step 4 — Check the back
This is what your piece should look like when it’s completely taped.

Last Step — Into the frame
Remove all the packaging and stickers from the frame. If you’re using a mat, drop that into the frame first. Then gently place your stretched piece into the frame and close the metal tabs into place.
If you don’t want to see the tape on the back, you can fit a piece of cardboard or even a paper bag over it.
That’s it — you’ve framed it yourself.