How to Cross Stitch
There is no one right way to cross stitch — here's mine, with a few notes for the things you might get criticized on.
January 1, 2026
Introduction
There is no “right way” to cross stitch. What I offer you here is one way… I would say my way of stitching. Later I will add other methods.
Most important and only rule:
ENJOY YOURSELF
Couple of things you MAY get criticized on:
-
Always go the same direction with your stitches.
***Yes, your stitches look neater and more uniform if all going the same direction. But you do you!***
-
Stitches go left to right and then stitched back right to left.
***Not true if you feel more comfortable going the other way… then do it! It’s your art, do what you want!***
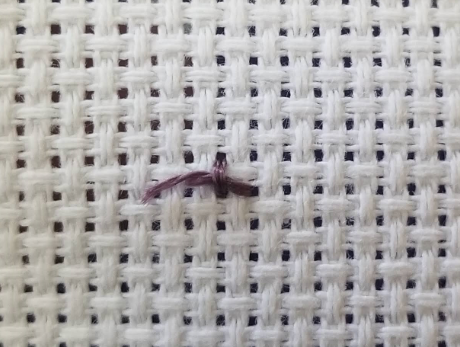
One Stitch
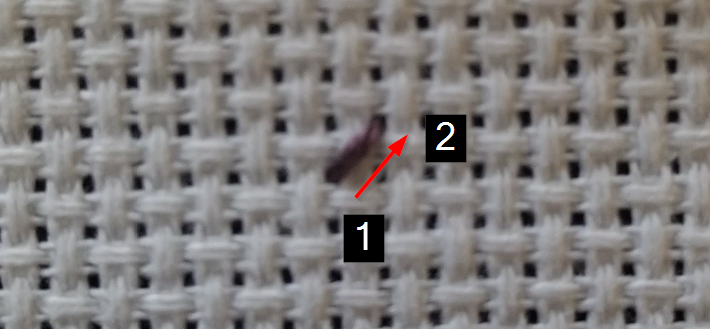
A single cross-stitch is two diagonal strokes that meet over a square on your fabric. Bring the needle up at point 1 and down at point 2 to make the first half. Then up at point 3 and down at point 4 to complete the X.
Several Stitches
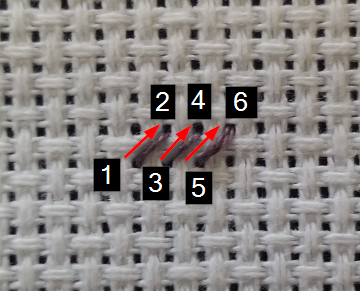
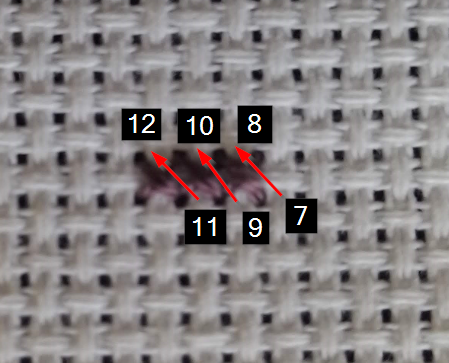
When you’re stitching a row, you can save thread (and time) by working all the half-stitches in one direction first, then crossing back over them.
Go up at 1, down at 2 — up at 3, down at 4 — up at 5, down at 6. Now you have a row of / half-stitches. Then come back the other way: up at 7, down at 8, up at 9, down at 10, up at 11, down at 12 — and your row is done.
Video
Thread Tail Method
A way to start a thread without ever tying a knot — your first stitch catches the loose tail on the back and locks it in place.
Step 1
Thread your needle and bring the two ends of the thread together, so the needle sits at the centre of the thread.
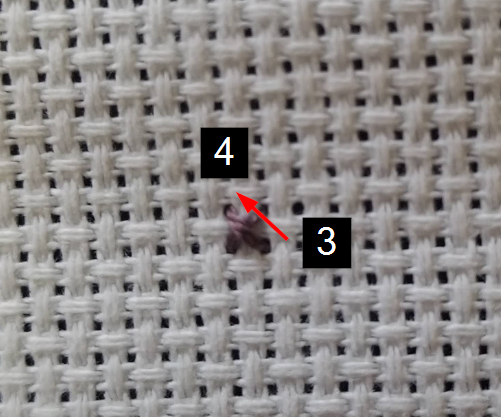
Step 2 — This is the front
Bring your needle up through hole #1 in the picture (bottom-left corner of your square), then push your needle down through hole #2 (top-right corner of your square). This makes the first / half of your X.
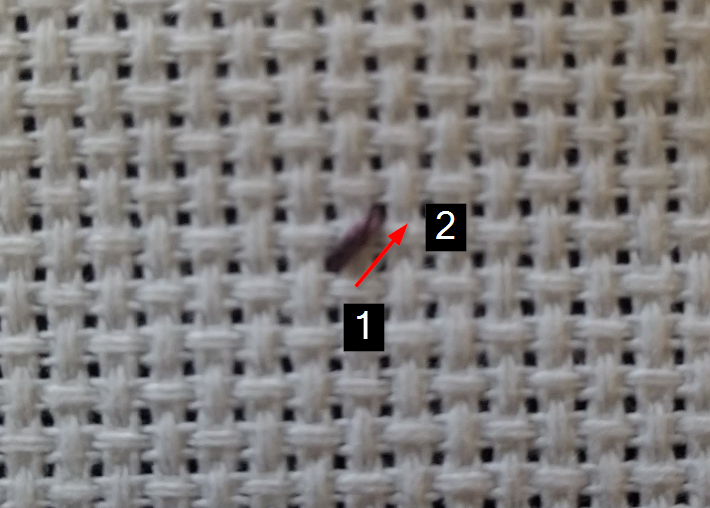
Step 3 — This is the back
On the back, hold the loose ends of your thread off to the left. Bring the needle up over the ends and push your needle into the hole directly below the hole your thread just came out of (in this picture, the bottom-left corner of your square).
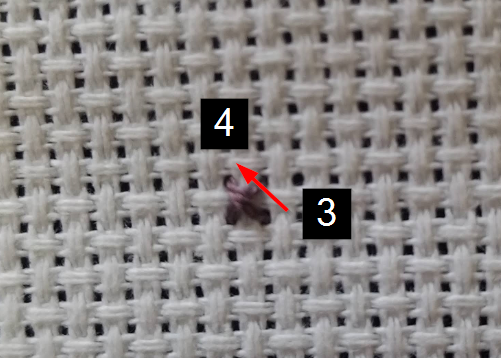
Step 4 — This is the back
Pull the thread through to the front so the loose ends are now trapped against the back of your fabric.
Step 5 — This is the front
Bring your needle up through hole #3 (bottom-right corner of your square) — this secures the ends you trapped in step 4 — and push your needle down through hole #4 (top-left corner of your square). That finishes your X, and you’ve made your first cross stitch with no knot at all.