Reading a Pattern
How to read a cross stitch pattern — symbols, color keys, gridlines, page layout, and where to actually start.
June 1, 2026
The first time you open a cross stitch pattern it can look like a wall of tiny symbols. Once you know what each part is doing, it’s actually pretty simple. Here’s how to read one.
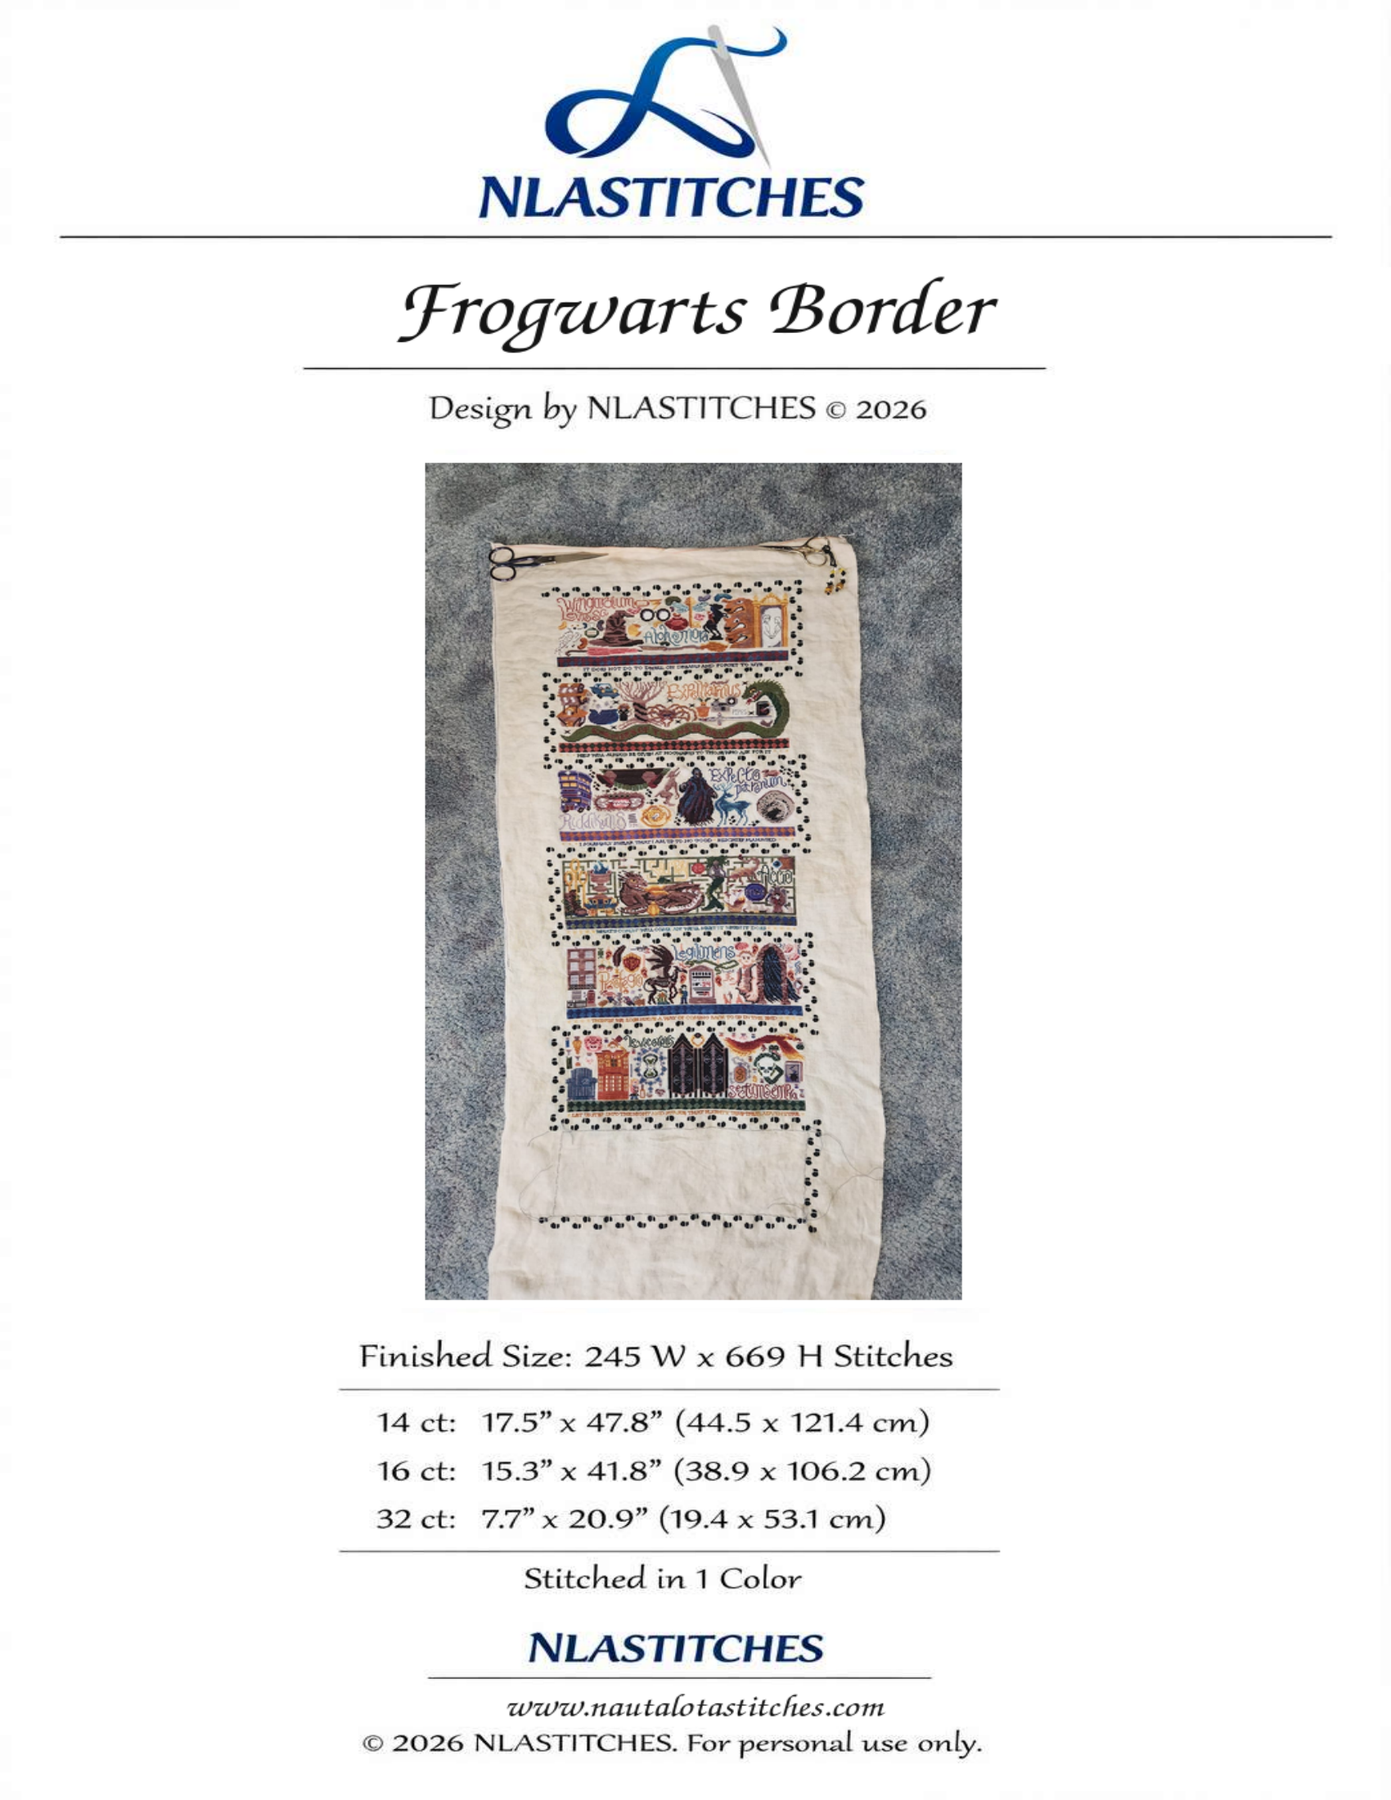
The examples below come from my own free Frogwarts Border pattern — it’s a good teaching pattern because it’s single-colour, has clear gridlines, and ships as a 28-page chart so the multi-page layout shows up naturally.
Step 1 — The cover / info page
Before you stitch a single X, check the cover for:
- Stitch count (e.g. 245W × 669H)
- Recommended fabric & count (e.g. 14-count Aida, 32-count linen)
- Finished size at different counts — and how the count changes the size
- Floss list / shopping list — DMC numbers, total skein count
- Anything special: beads, specialty threads, blending filaments
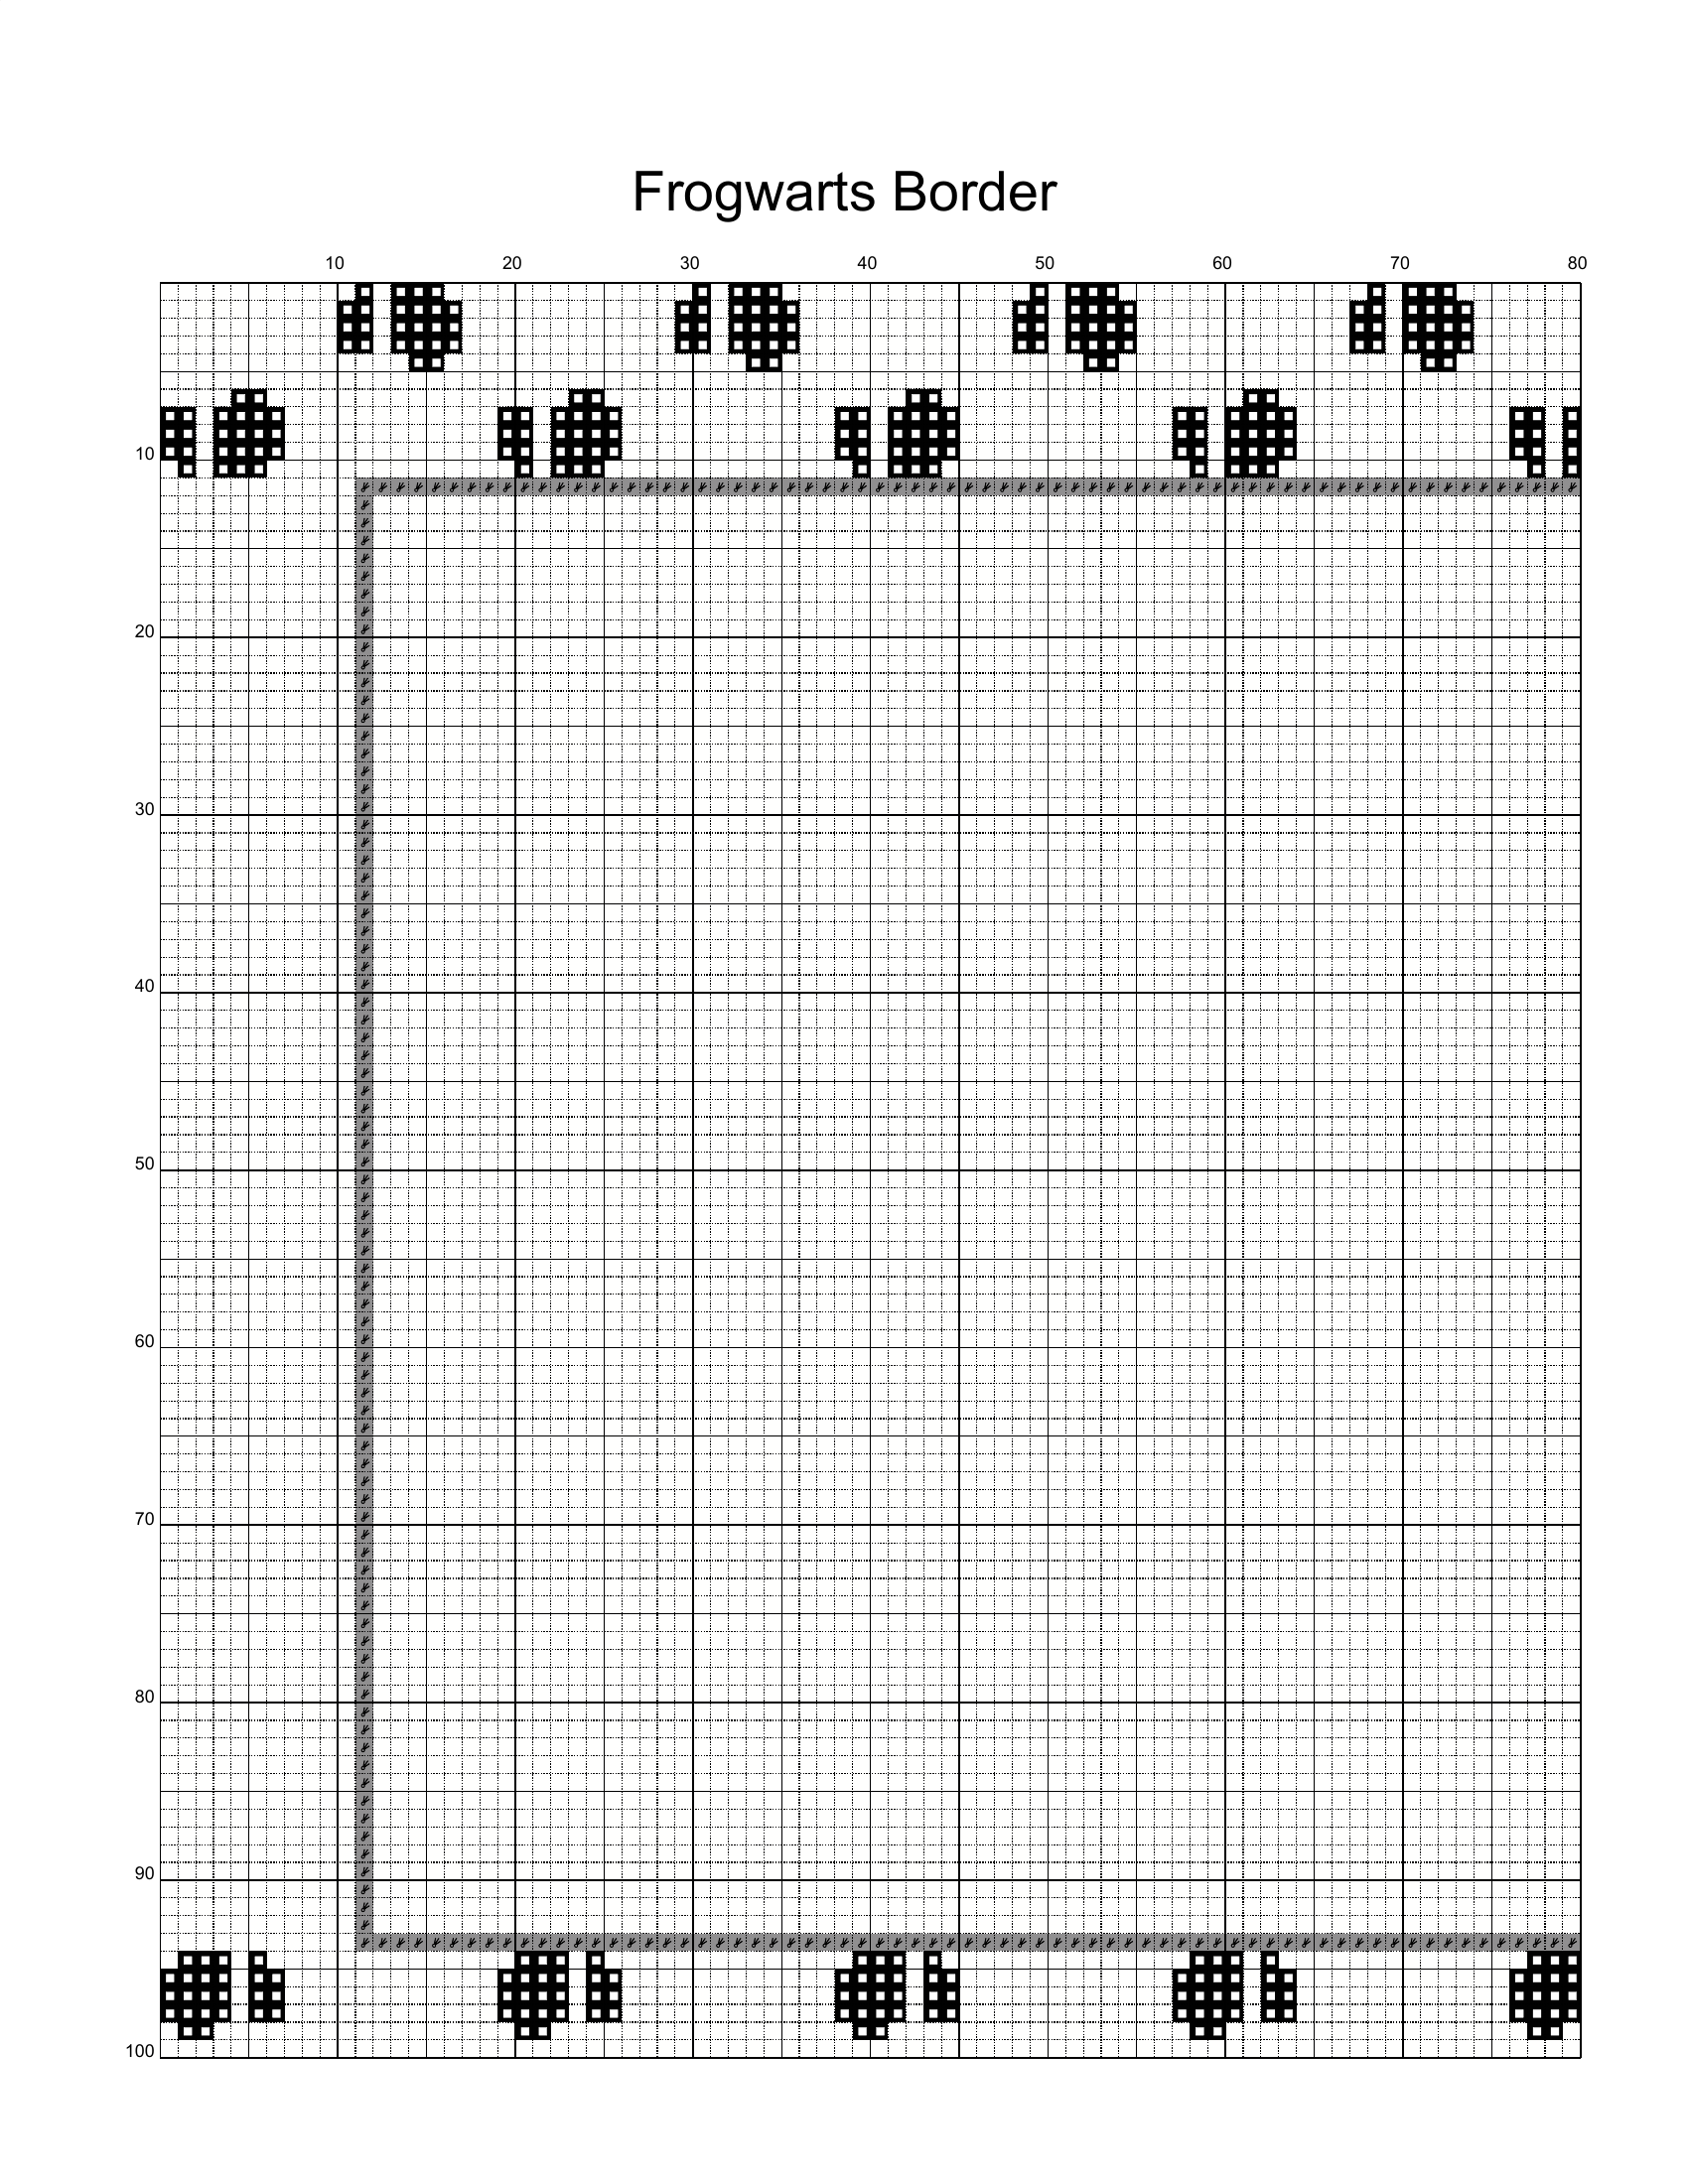
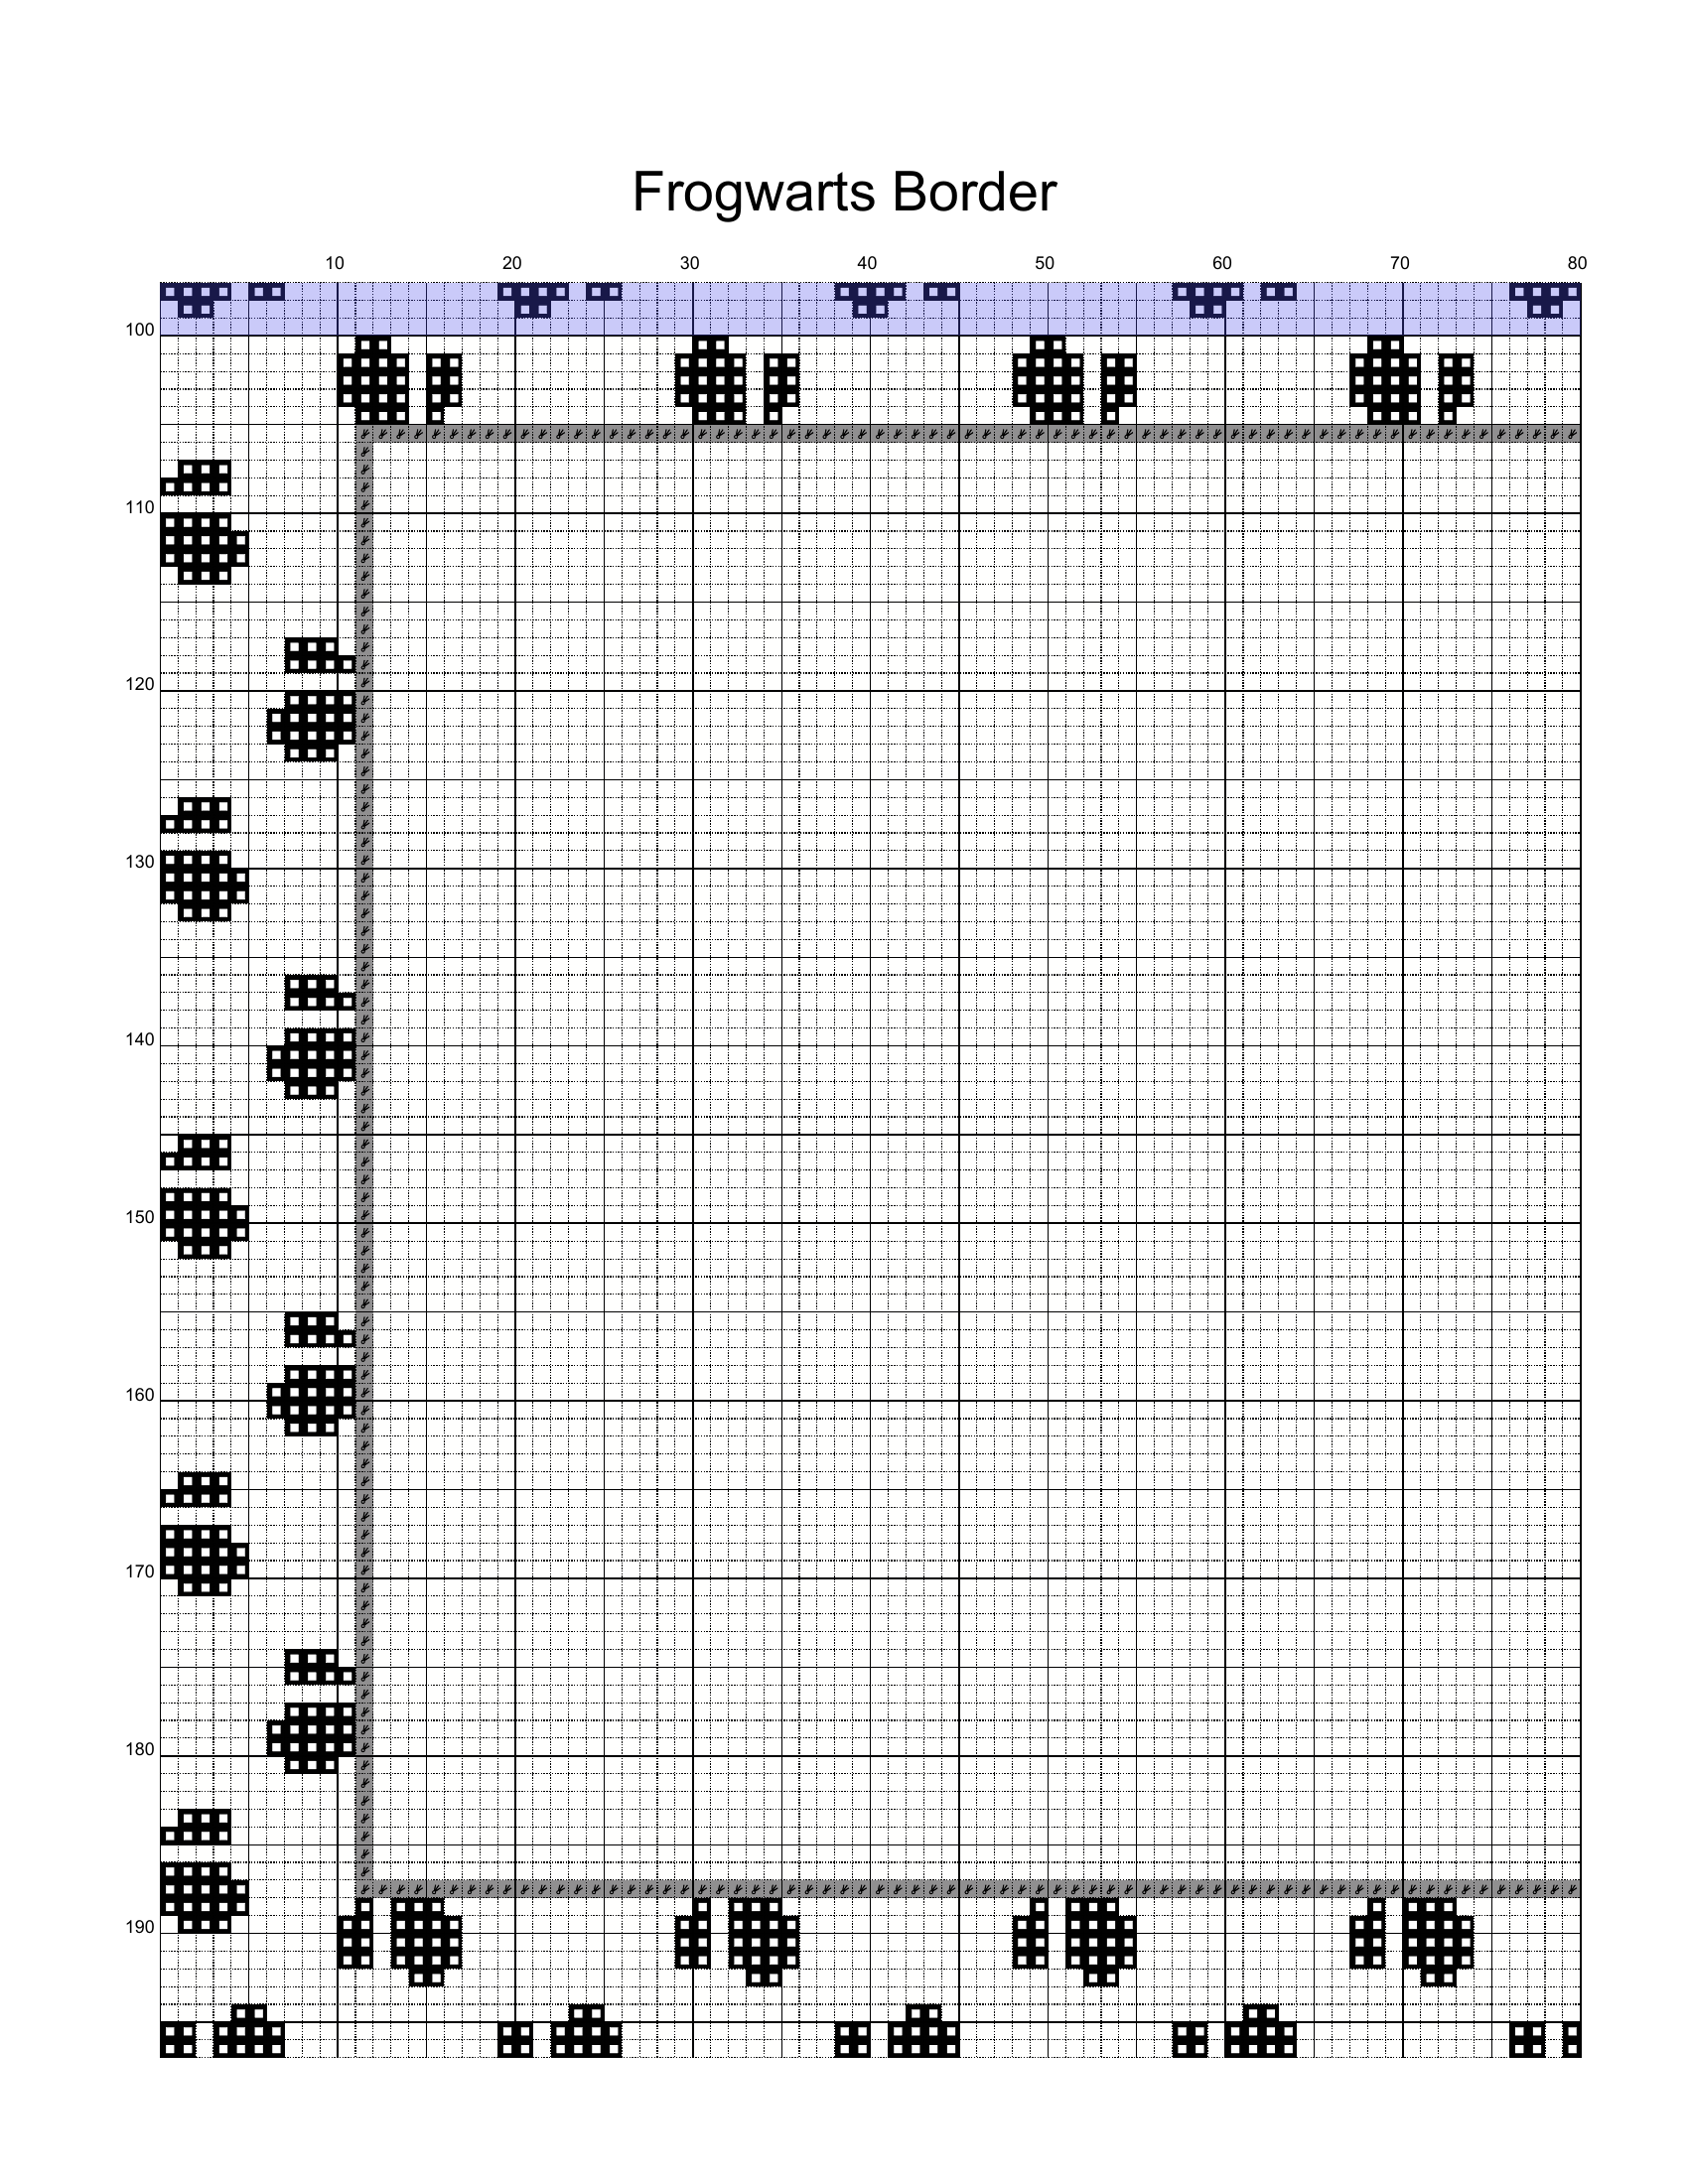
Step 2 — The chart itself
- The grid is the fabric — one square = one stitch (or one “over-two” block on linen)
- Each symbol = one color of floss
- Heavier gridlines every 10 squares are there for counting — use them
- Arrows on the edges mark the center. Most patterns are stitched out from the center so the design ends up centered on your fabric
- Empty squares = unstitched fabric (the fabric color shows through there)
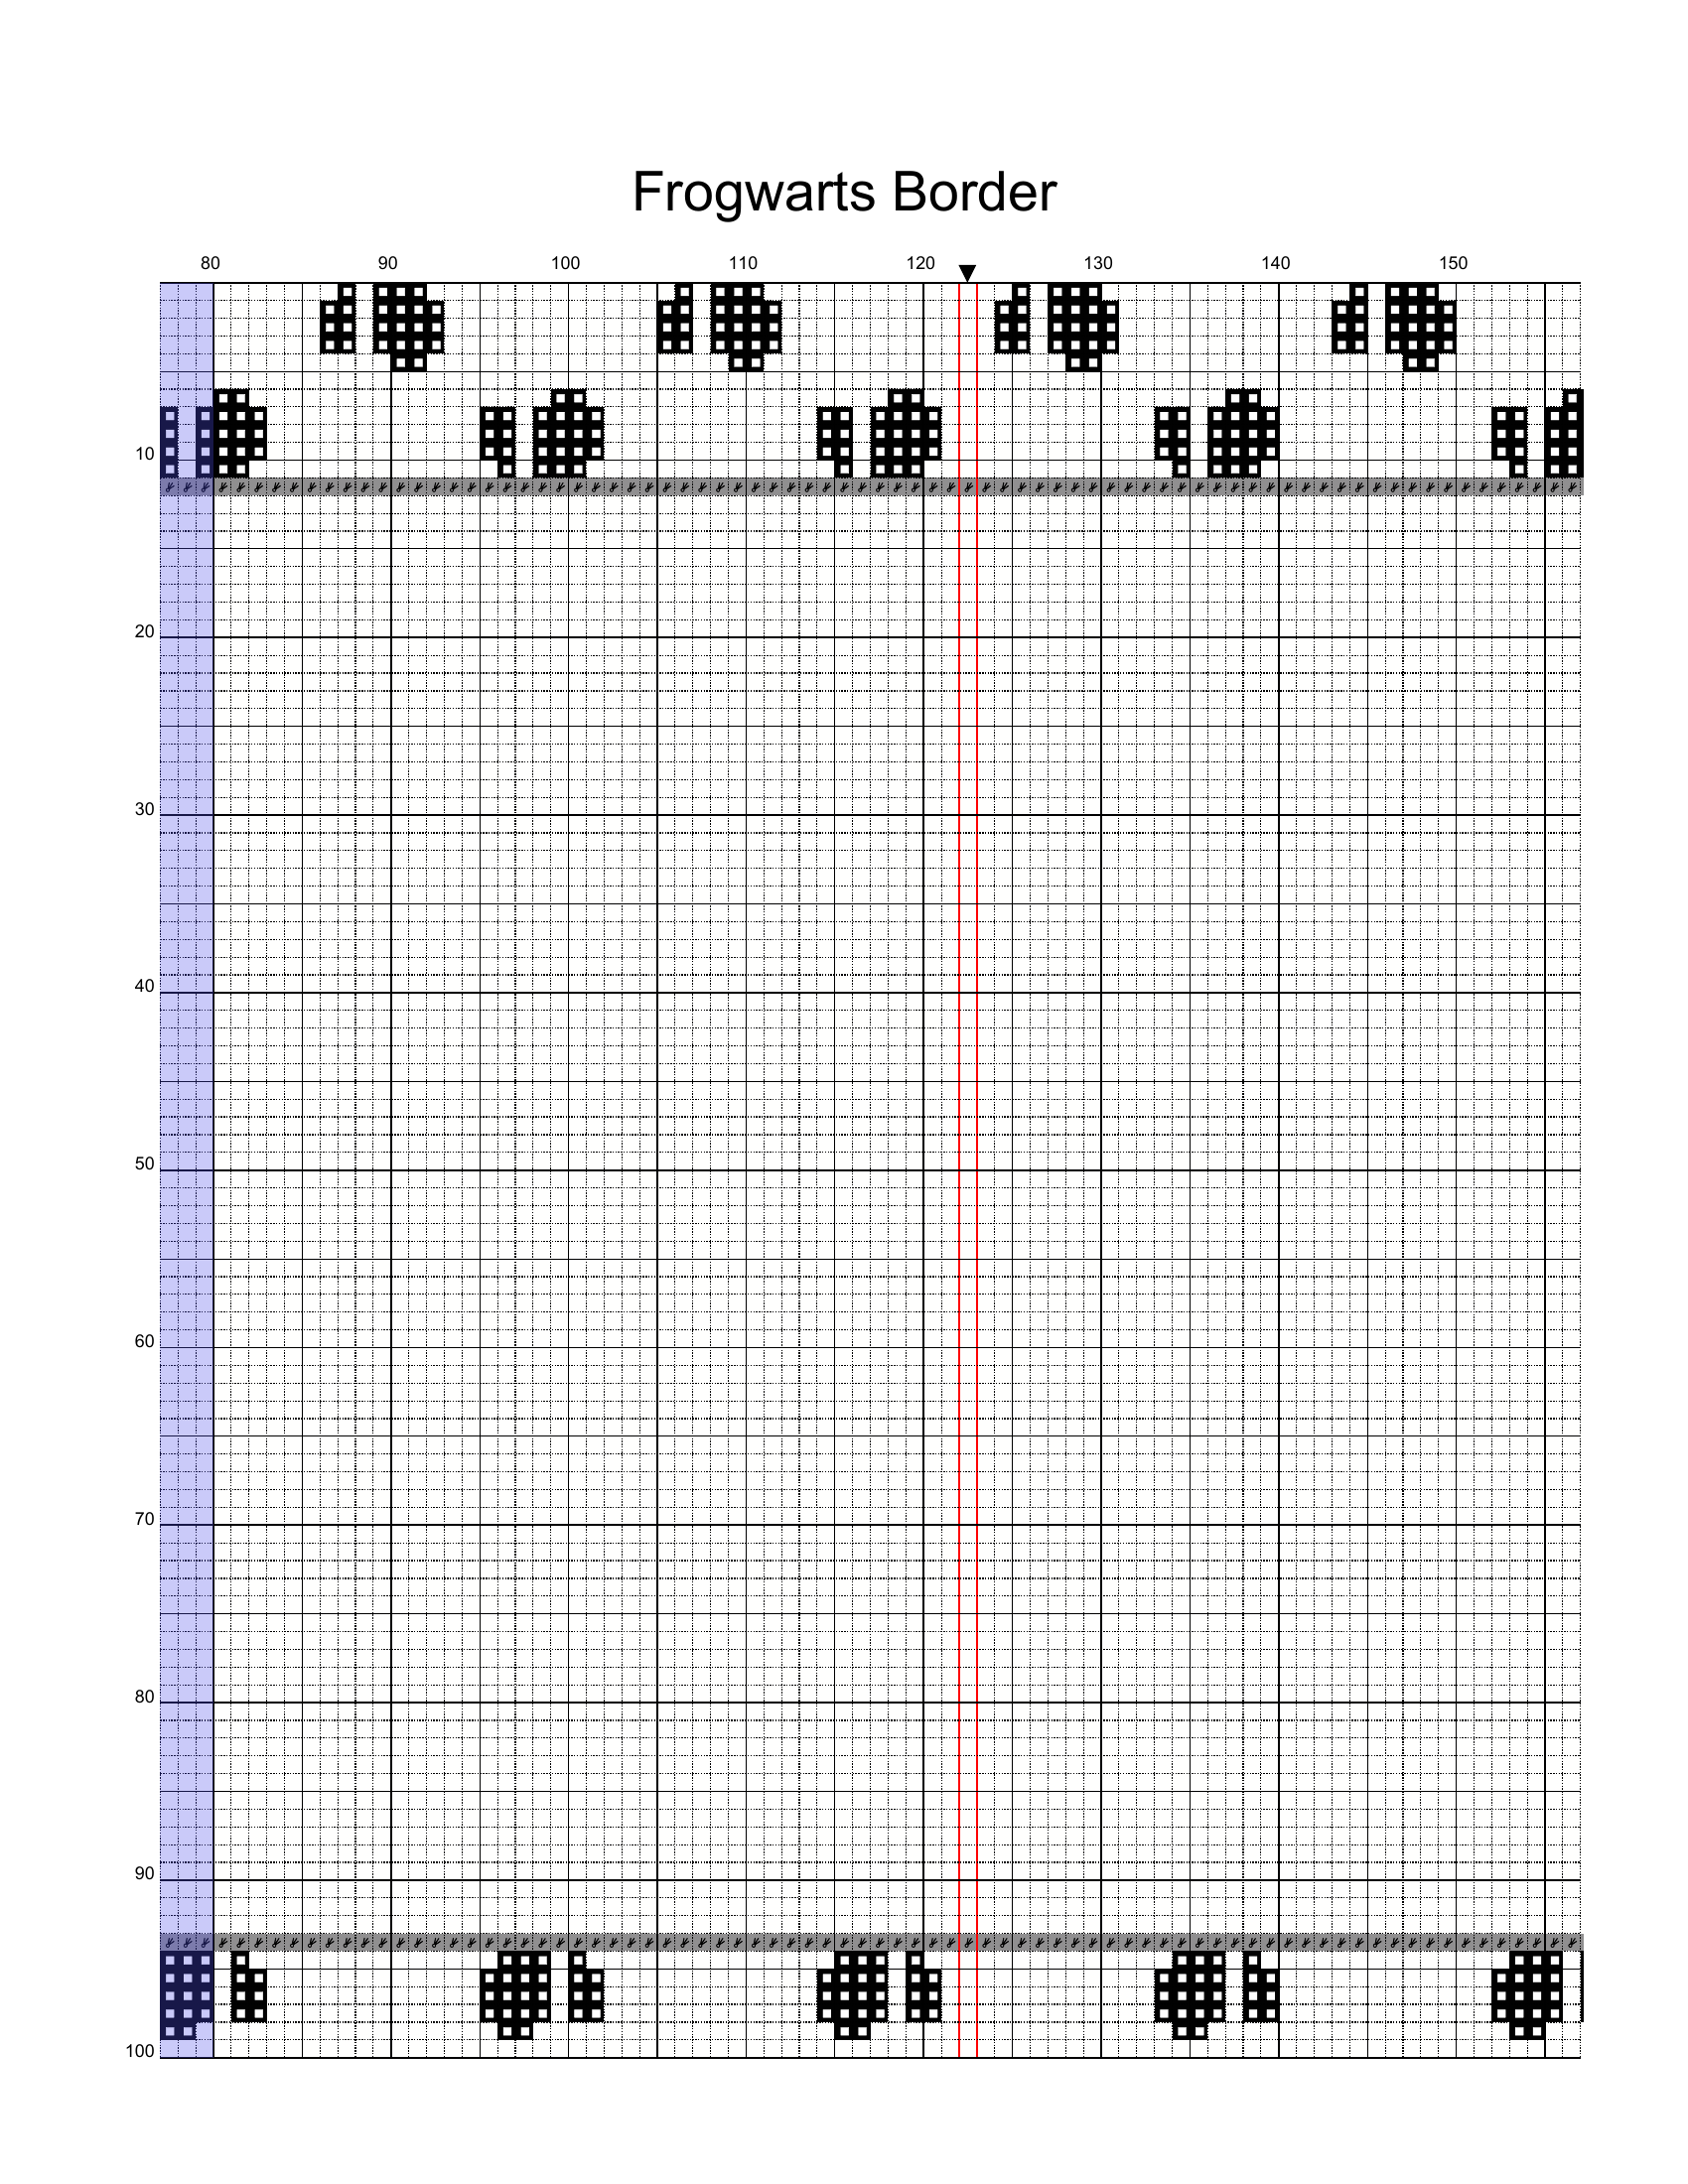
The little ▼ arrow at the top of the right-hand page above marks column 120 — the horizontal center of the design. Match that to the center of your fabric and you’ll end up with the whole piece centered.
Step 3 — The color key (the legend)
- Symbol → color — the most important column
- DMC number (or Anchor, Sullivans, etc. — sometimes both)
- Number of strands — usually 2 for cross stitch, 1 for backstitch, varies by designer
- Skeins needed — useful for shopping
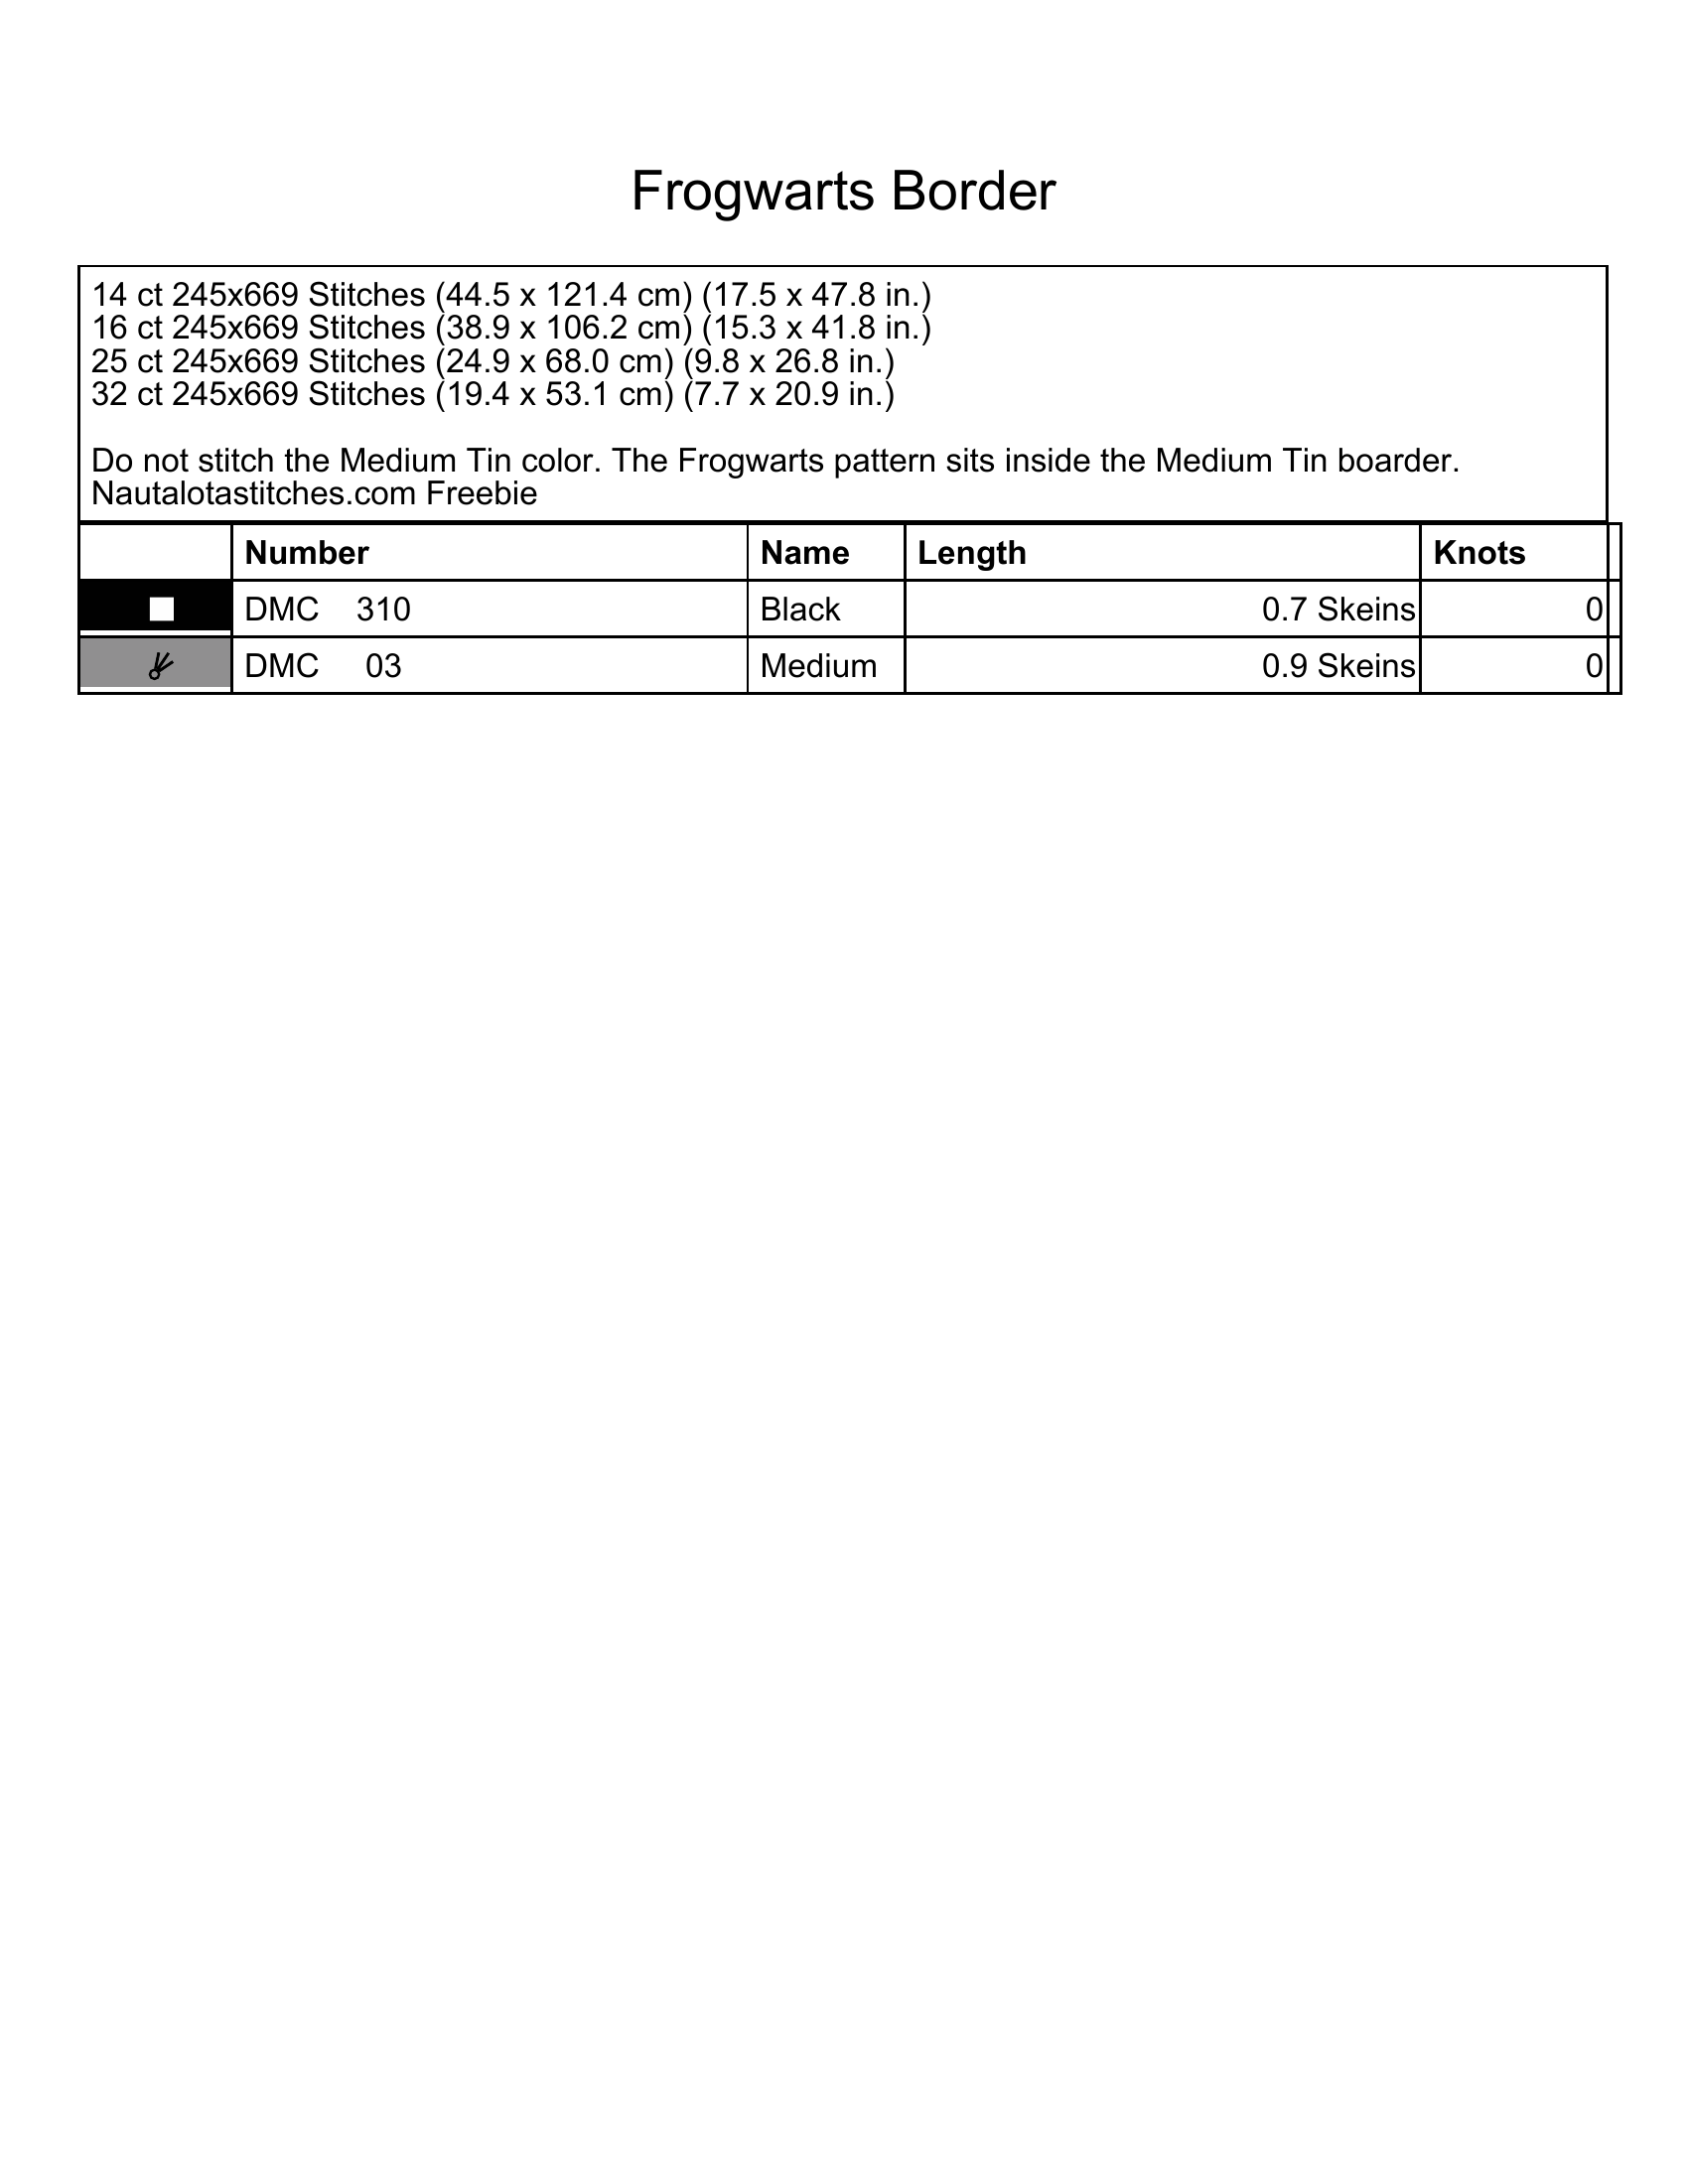
Watch for “do not stitch” rows in the key — designers sometimes include the fabric colour or a placeholder colour so the chart renders correctly, but you skip stitching it. In this pattern the Medium Tin row is the empty inside of the border — you don’t stitch it.
Step 4 — Backstitch & outline markings
- Solid lines on the chart = backstitch (outlines, lettering, fine detail)
- The colour is usually noted separately in the key
- Backstitch is typically done last, after all cross stitches in that area are finished
(Example coming — Frogwarts Border is full cross stitches only, so I’ll add a screenshot from a different pattern.)
Step 5 — Special symbols
Beyond the full cross, you’ll commonly see:
- ½ stitch (half stitch)
- ¼ / ¾ stitch (fractional / quarter stitches)
- French knot (often a filled dot)
- Bead (often a circle or diamond)
- Specialty stitches — varies by designer, always check the key
(Example coming — none of these appear in the Frogwarts Border. Screenshot from another pattern to follow.)
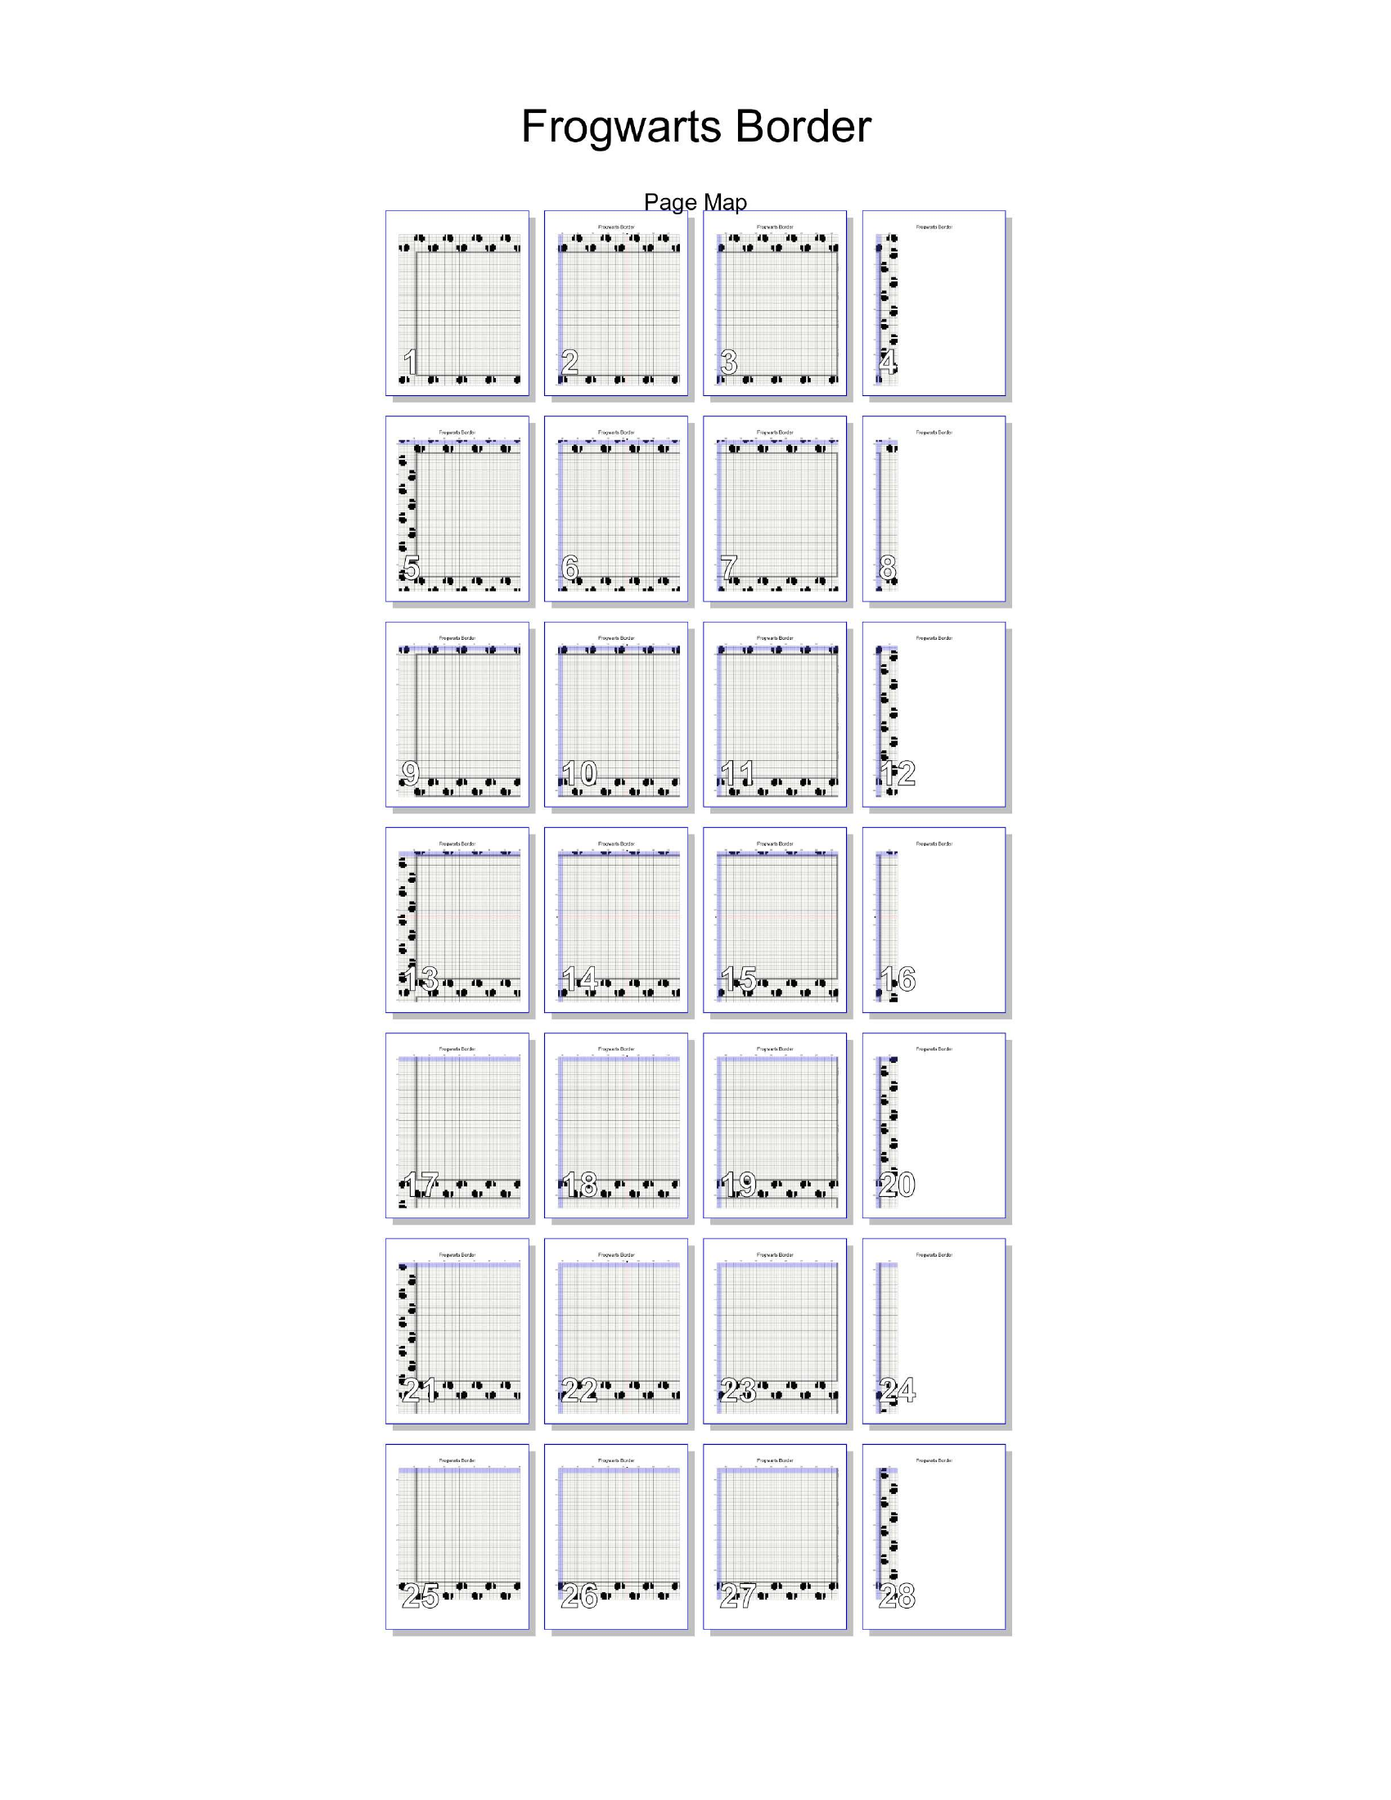
Step 6 — Multi-page charts
For bigger patterns broken across pages:
- Look for page-overlap markings — usually a tinted band along the edge showing rows or columns repeated from the adjacent page so you can stitch across the seam without miscounting
- Grid column/row numbers along the edges keep your place across pages
- Tape pages together, or work one page at a time
Many patterns also include a page map showing how every chart page tiles together — handy for orienting yourself in a huge pattern:
Step 7 — Staying oriented while you stitch
- Decide where you’re starting — center, top-left, or somewhere chosen to match the fabric (see the FAQ below). Mark that spot on both the chart and the fabric so they line up
- Keep your orientation straight — some stitchers put in a small arrow of stitches pointing “up” on the fabric so they always know which way the design goes, especially handy if you put the project down for a while
- Mark off finished stitches with a highlighter, pencil, or app
- A magnetic board + ruler helps track the row you’re on — if you’re stitching from a paper pattern
- A pattern-keeper app (Pattern Keeper, MarkUp, etc.) on a tablet is worth a try — most designers (myself included) ship a Pattern Keeper file alongside the PDF. I personally stitch everything digitally now — once you’ve used a tap-to-cross-off chart on a tablet, it’s hard to go back to paper
FAQ
Where do I actually start? It depends — this is mostly personal preference. I was taught to start in the center, and I still do that when I’m cutting it tight on fabric and need to be sure the design will fit. But honestly, most of the time these days I start in the top-left and work down.
The other thing to think about is placement. Sometimes you want the design to land in a specific spot on the fabric — for my Snow Queen WIP I wanted her to look like she was walking through the snow, not floating in the sky, so I started where she’d be standing. And if you’re stitching on hand-dyed fabric (see Tea & Coffee Dying Fabric) you might want a particular swirl or darker patch to land in a specific spot in the design — adjust your starting point to put it there.
Whichever you pick: count out where the design will end before you put in your first stitch, so you don’t get halfway across and run out of fabric.
My fabric count is different — will my design be the same size? No — higher count = smaller finished design. See Calculating Fabric Size for the math.
What if a symbol isn’t in the key? Double-check the key page (sometimes it’s split across two pages). If it’s truly missing, it’s a designer typo — contact them.
What if there are too many colors crammed into one area? That’s called confetti. The parking method helps — tutorial coming.
Once you can read a chart, every pattern you’ll ever buy works the same way. The symbols change but the system doesn’t.
Did I miss something, or do you have a question? Send me a message through the contact form — I’ll add it to the FAQ above.